“And this is my snow saw,” said Nick, as he removed the gleaming blade from its holster. A strangely curved, unwieldy and yet hugely useful device for creating a snow cave, as I would find out later that weekend.
Led by Nick H, we were a band of five who had gamely signed up for a trip described as “snow caving”. Starting at the club lodge, our objective was to climb to the Ruapehu Summit Plateau, find a suitable bank of snow to dig into for the night, and maybe treat ourselves to a few peaks the next day.
We arrived at the lodge without incident on the Friday evening after the usual after work departure and fuel up at Bulls. The lodge was at capacity or thereabouts but it looked like we were the only group planning to head up without skis or snowboard.
Knowing we wouldn’t be around the lodge much, we rostered on to prepare breakfast on the Saturday. Chores complete, Nick had the brainwave to prepare our ice cave dinner before we left, and he set about whipping up a large lasagne. I say whipping up, as barely 45 mins later we were assembling in the gear room, packs full to the brim with saucy goodness.

The weather forecast looked favourable with clear skies predicted, and a run of fine weather had lowered the avalanche risk. Sure enough, by the time we got going, around 10.30am, it was a beautiful day to be on the mountain. We positively skipped up (well, as much as you could carrying all that lasagne) the poled route to the NZAC hut.

Sensing the snow conditions were right to try a new skill or two, Nick took Lukas, Michael and me through the basics of a glissade descent. A little while later and after an additional lesson in ice axe mechanics, we were on our way again, taking a fairly direct route to reach the crater rim near Glacier Knob just after 2pm.

Our original plan from here was to skirt around to Paretetaitonga before heading down into the plateau, but given the time and the pace of the group we decided to descend directly instead.
Picking a spot a little away from another group of snow cavers/campers, we selected a location on the east-facing slope near the base of the plateau just under Dome. We reasoned that warmth first thing in the morning as the sun rose would be preferable to having sun for longer into the evening, especially as we would be getting warm digging.
The other point worth noting about site location was selecting a point on the face of the slope where the angle was steep enough that you could get away with only digging a horizontal entrance into the face and still have enough depth to construct the cavern, but not too steep that it made the whole campsite a difficult place to be. We picked a slope at approximately 25 degrees.
In high spirits, we handed out the snow shovels (one per person definitely helped) and broke ground around 3pm. This was my first time in a snow cave, so I’ve described it a bit more below along with some “beginner observations” of things that become apparent only as you get further into the construction process.
A disclaimer here – I’ve not taken any formal instruction on how to build a snow cave, so please check in with someone who does know what they are doing before trying any of my suggestions yourself!
While I’ve seen several more elaborate designs, the snow cave we were trying to build consisted of an entrance tunnel leading to a cavern with a domed ceiling. The base of the cavern is a flat shelf positioned a few cm higher than the top of the entrance tunnel. This height difference creates a sump for the cold air, trapping it in the entrance tunnel, below the shelf, and thereby keeping the inhabitants toasty warm. Finally, a small air hole is poked into the top of the cavern to provide a flow of air and avoid suffocation.
The first step was to build the entrance tunnel – simply a horizontal cut straight into the slope just bigger than body-sized to allow crawling in and out. This part can feel quite constrained and claustrophobic as you lie on your back, headfirst into the tunnel, with clunks of snow raining down around you! But Nick advised us that a bit of discomfort by keeping the tunnel height low would pay dividends later by reducing the amount of snow we would need to remove in creating the cavern to keep the shelf high enough.

Though we had had some wild talk on the ascent about constructing a single big cave for all of us, the fact that only one person could dig the entrance tunnel at a time meant a more practical decision was to split into multiple caves so they could be started in parallel.

It took about 30-40 mins to create a long enough tunnel (about one body length for the angle of the slope we had chosen), taking it in turns to dig and clear the snow. We then started to dig upwards to make the shelf and start the cavern.
All us snow cave newbies were quite relaxed while digging at the start, naively thinking we had heaps of time. It was only when we caught sight of Nick starting to rush between the caves and dig like mad, we learned he was quite concerned about us finishing the caves before sunset. Looking back, you really do only understand how much work it is after you’ve dug one! The lesson here is probably to err significantly on the side of caution in terms of how much time you allow for the construction.
As the cavern got larger, it became possible for two people to dig at the same time which sped things up remarkably. A third was stationed outside the tunnel to remove the discarded snow from the entrance. As the volume of this snow increased, we found a tarp placed on the floor of the tunnel made catching and clearing much more efficient.
About an hour further in, it felt like we were making good progress. I had just about got the hang of a good technique with the snow shovel (drive its sharp base edge in four sides of a square and then lever the resulting cube of snow out) and could appreciate – but not for the life of me replicate – Lukas’ elegance with the snow saw (cut horizontal and vertical stripes into the snow as if you were dicing a mango and then use the shovel to remove).

The cavern at this point was about 2m wide and 1.5m deep, and there was plenty of space above a seated person’s head. But this wasn’t quite room enough for the three of us assigned to this cave for the night.
Then we hit the ice. The rear of the cavern had changed from delightfully fluffy powder, easily convinced it wanted to vacate the area, into a solid block that stubbornly refused to budge without some heavy-duty convincing. Looking back, there were no obvious external signs of this hidden layer, though some form of test trench may have revealed it. Interestingly, the other cave site just 5m away was much less affected.
My mind at this point wandered back to a comment one of the instructors made on snowcraft about emergency shelters – if you find yourself needing to build one then a snow cave is probably not the first choice. Two and a half hours in, pretty tired from the digging, and with most of our waterproofs starting to give in after being in close contact with snow and ice for most of that time, I could see why simpler would be better in an emergency!
After what felt like a good 45 mins attacking the ice with saw and shovel (and probably removing only 20cm), Nick suggested we just give up on trying to go further back and just widen the shelf instead, so attacking the softer snow at either side. This turned out to be a sensible call and, though it would prove to be a cosy night for the three of us top-and-tailing, we were able to complete the cave by dusk.
A few minutes sculpting the ceiling to smooth away any parts that might encourage drips to fall on us rather than roll away down the walls, and creating an air hole, we were ready to go. All in all, it had taken about 3-4 hours to build. This was a little longer than Nick and Elisabet’s last attempt, which we put mainly down to the ice.

The sun had gone down by this point and the cold had set in surprisingly quickly. Though the group had made an attempt at a camp kitchen, everyone decided instead to take their exhausted bodies to bed. Tupperware lasagne was passed between caves, before lights out soon after.

We had a few different sleeping setups between the group, ranging from fully sealed alpine bivvies with four season bags and inflatable mats, to a three season bag on a combo of foam and inflatable mats inside one of those plastic emergency shelter bags for drip repellency.
While everyone was mostly warm and comfortable enough (ignoring the cramped conditions, and the legs slightly too close to the entrance tunnel), it was worth noting the emergency shelter bags seemed to create more condensation on the inside than they protected on the outside. I’d either take a breathable bivvy or go without an outer waterproof layer next time.
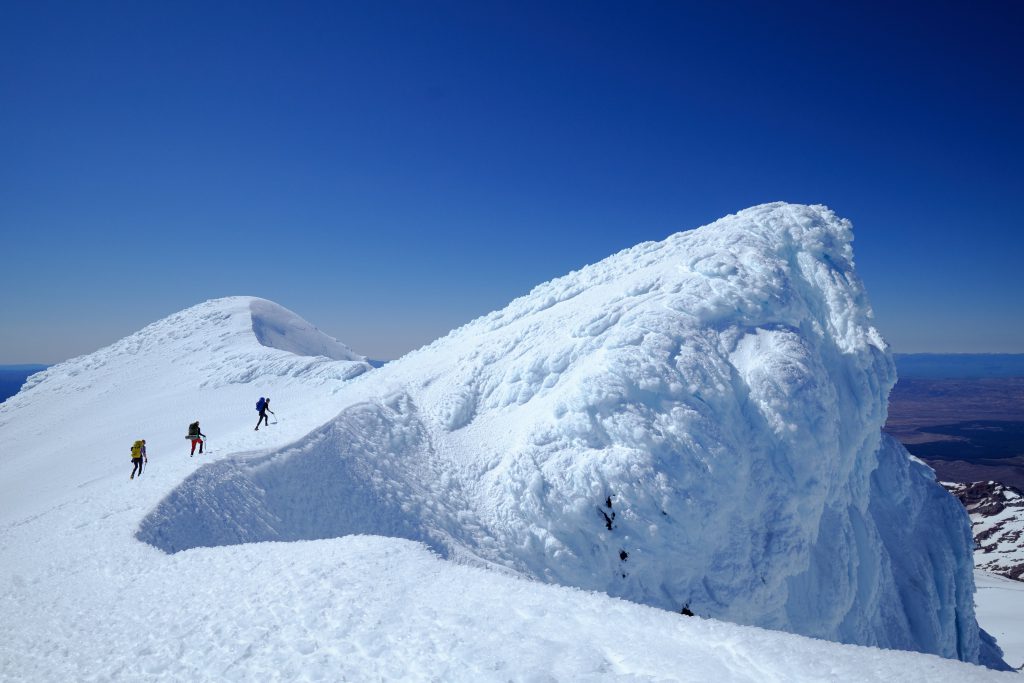
Lukas and I braved the early morning chill and rose just before dawn to make the quick ascent up Dome to catch a spectacular sunrise from the peak. We re-joined the others as breakfast was just beginning along with an industrial snow melting process to produce drinking water for us that day.

The surprise then contentment of finding ourselves in such a stunning geological cathedral so early on a delightfully warm and peaceful morning made all our efforts the evening before worth it.

After breaking up camp, the group split into two with one heading directly back down and the other aiming to take in a couple more peaks on the way. The latter group headed directly across the plateau (stopping for a brief sunbathe), taking in the views from Tukino Peak and Te Heuheu before navigating down the uppermost reaches of the Pinnacle Ridge, finally dropping into the ski field.


The group reconvened for a (guilty) coffee and bowl of fries at the cafe before making our way back to the lodge.
A cracking trip – and one that will certainly stand out in my memory for many years to come!
(Author’s note: this refers to a trip from September 2019, which is only just now finding its way into a trip report – apologies to all!)
