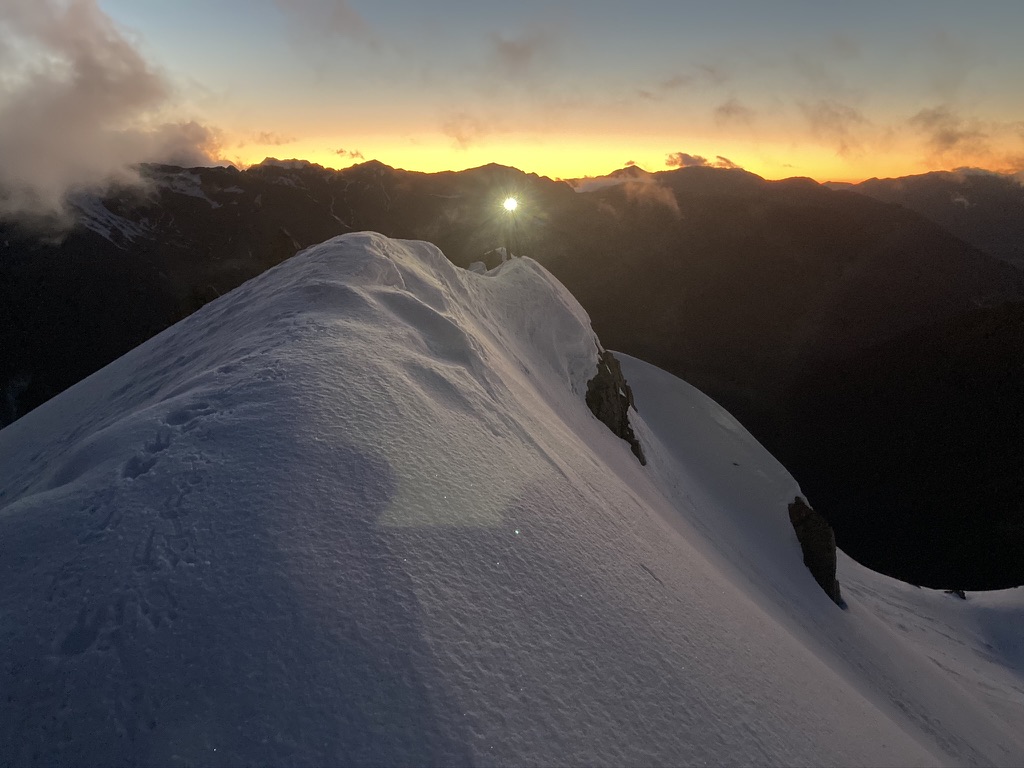
In August 2016 we completed our AIC (Alpine Instruction Course) at Temple Basin in Arthurs Pass. I remember one morning after emerging from our snow cave high up above the ski field, we got the best views of the rising sun lighting up the mountains across the pass. The most prominent of the lot was Mount Rolleston.
So began something of a love affair with this particular peak, as it felt somewhat poetic to be able to one day stand on the peak and look back across at what would be one of our first triumphs in Mount Temple.
Throughout 2017, 2018 and 2019, numerous plans were made to make the attempt via what is considered an absolute NZ alpine classic route – the Rome Ridge. However for various reasons (some of which may be recorded in the annals of this newsletter), we never even got close. In fact, on two of those occasions we didn’t even make it to Arthurs Pass, instead opting for other places in the South Island given the terrible weather outlook. This part of New Zealand has a habit of that.
2019 was something of a write off for our alpine exploits as we had possibly the worst luck ever with almost every trip getting rained off or otherwise thwarted. And of course, 2020 has been a peculiar one for everyone. Fast forward to now. We had the rare opportunity to chase the weather down south for over a week and that’s just what we did.
After an early ferry and long drive via Murchison to Arthurs Pass on the Monday, we set out Tuesday morning for a warm up climb. We opted for the popular Avalanche Peak, and then on to Lyall Peak and Mount Bealey in what is a pleasant half day loop.
We set out up the Avalanche Peak Track which is a slightly steeper and shorter option to the more popular Scotts Track. There are a couple of slips near the tree line but these don’t impede on the track at all and otherwise it’s a very nice and well marked route. Towards the very top, one east-facing section is exposed to avalanche risk when there is snow on the ground, so caution is definitely advised.

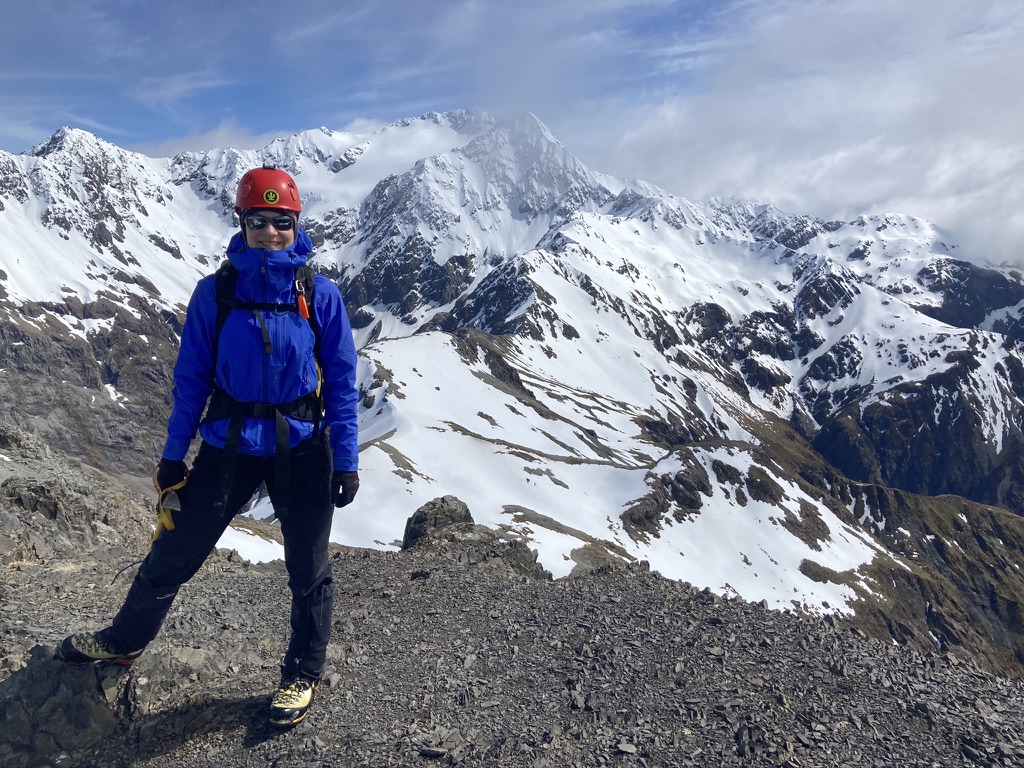
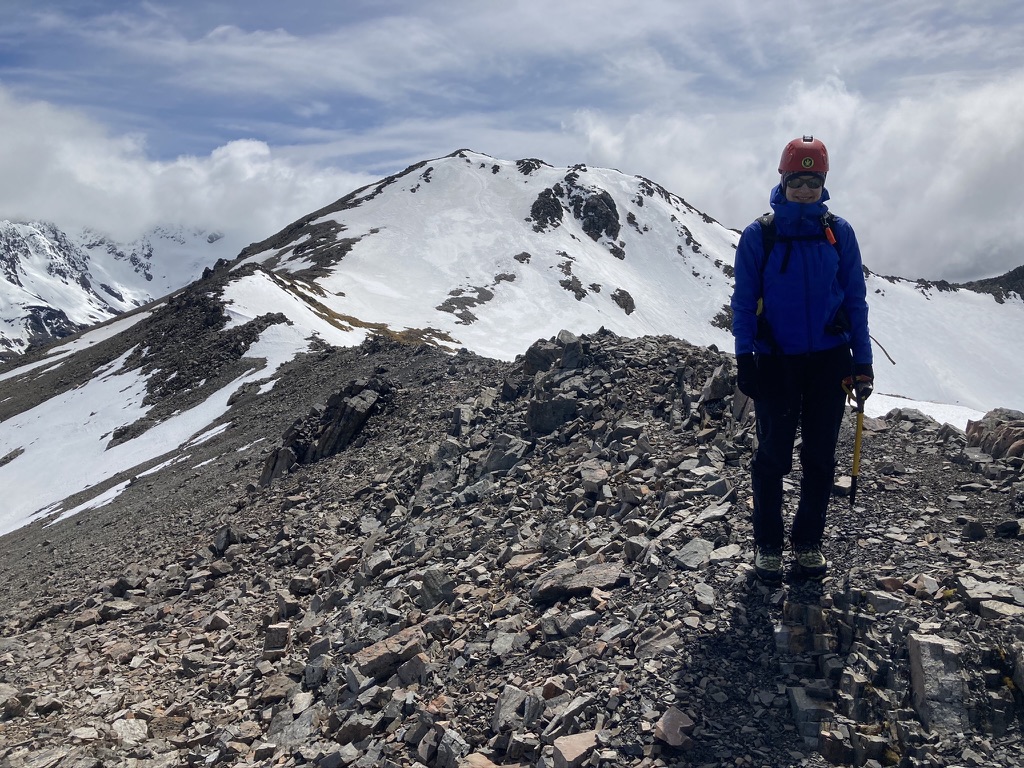
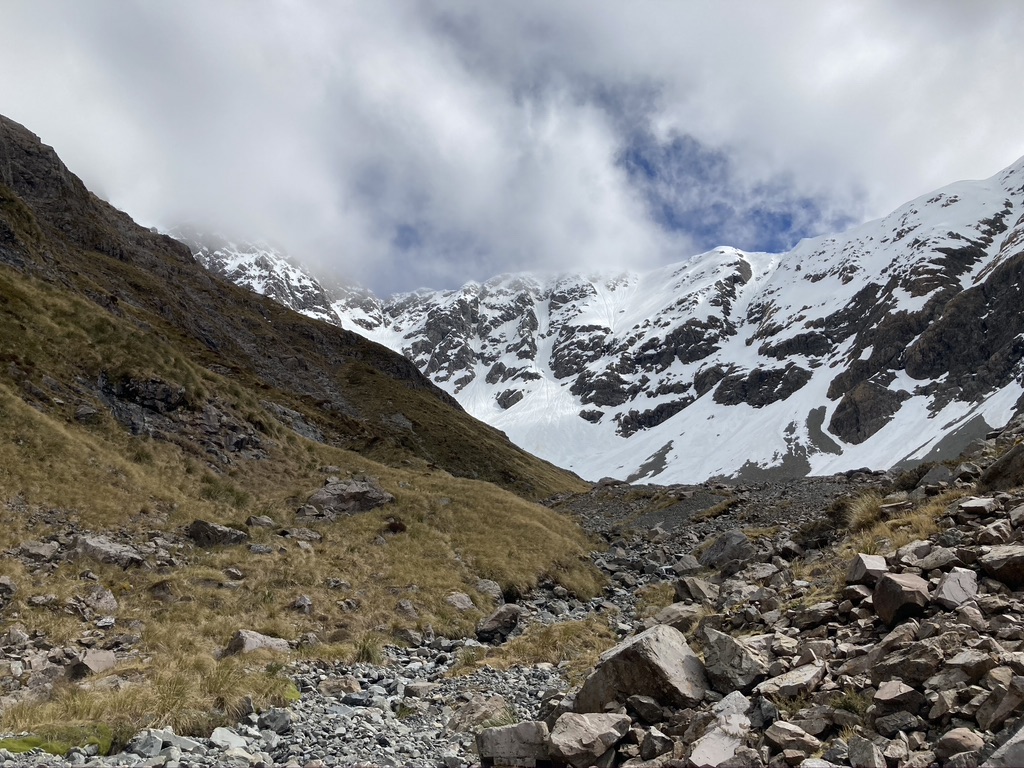
We arrived onto the top in just under 2½ hours. The views of our main objective were obscured slightly by cloud but it was enough to give us a really good sense of what was coming. Rolleston’s Low Peak erupts out of the horizon, towering over everything else around it.
Crampons on for the descent off Avalanche Peak and a lovely walk across to Lyall Peak without much issue. The most challenging part of this route is the traverse across from Lyall to Mount Bealey (provided you take the ridge direct instead of sidling the lower slopes which would be the obvious choice in more snow).
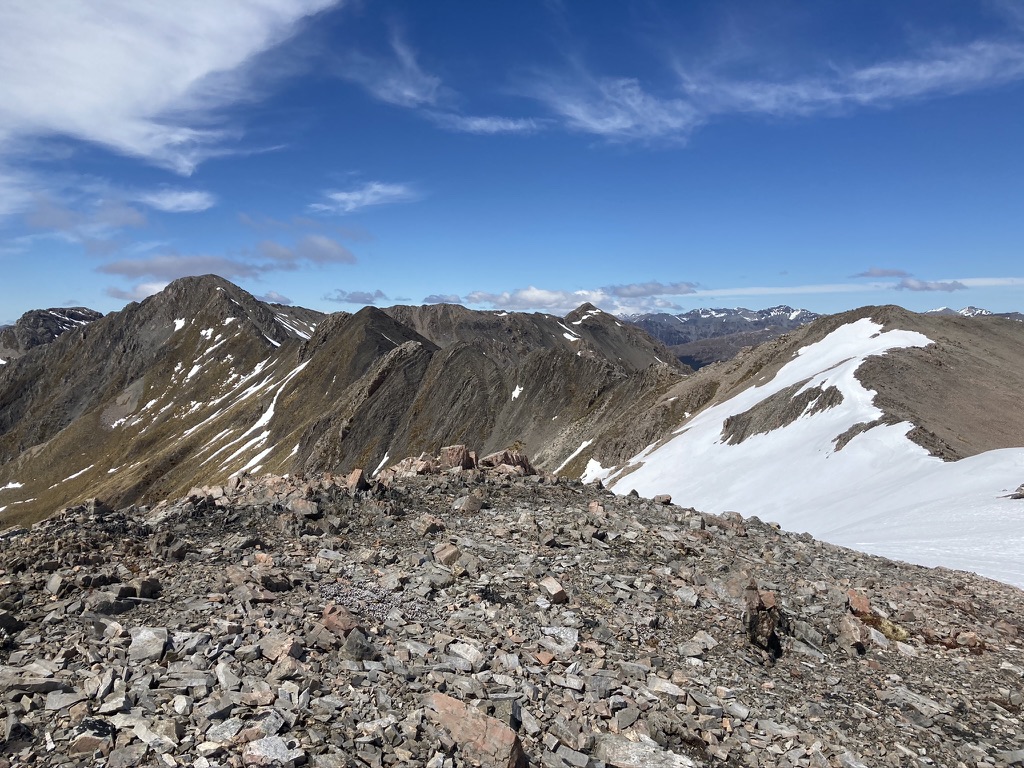
The ridge here becomes broken in places, with some wonderfully airy scrambling. There are numerous peaks and troughs to navigate and all in all, this section took us an hour. From Mount Bealey things ease off and after one more rise it becomes a simple down hill jaunt back to the treeline. From there it’s about 45 minutes back down to the road end. All up the route took us 6 hours and 45 minutes.
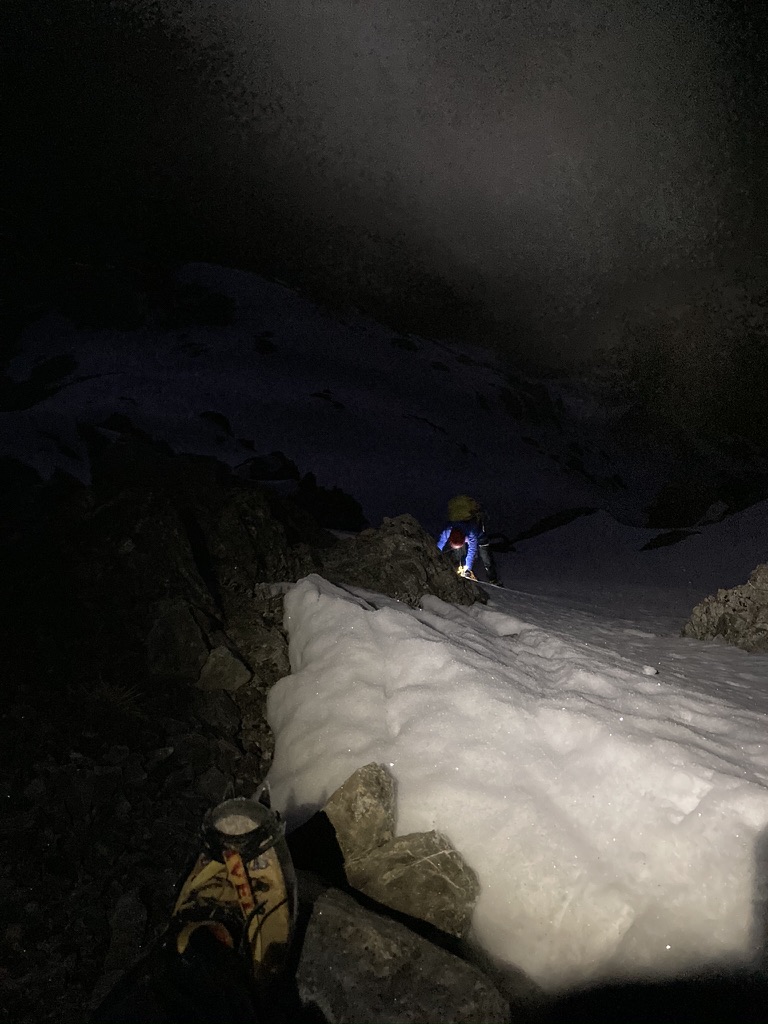
We did very little for the rest of the day, and after repacking our technical gear for the next day and a little dinner, headed to bed at 7 pm. Alarms blared just a few minutes later at 2 am and the alpine-start ritual began again. That is, snooze for 15 mins, walk around like a zombie for 15 mins, then 30 mins of panic and rushing.
We arrived at the Coral Track (which is an incredibly easy-to-miss turn off the side of a bend on SH73) at 2:50 am. There was already one car there, leaving room for just a couple more – be sure to go early if you want to leave your car there. We spent the first hour climbing through the forest speculating over how far ahead the party in front would be and whether they would kick good steps. When we broke the tree line and the first hill above it we caught sight of headtorches swirling at all angles, about an hour ahead of us. Turns out they were at the first steep section of the ridge. When we arrived we saw why they had been searching. They had expertly sought out a neat path through some trying steep and loose rock and we immediately knew we had some very competent scouts ahead of us.
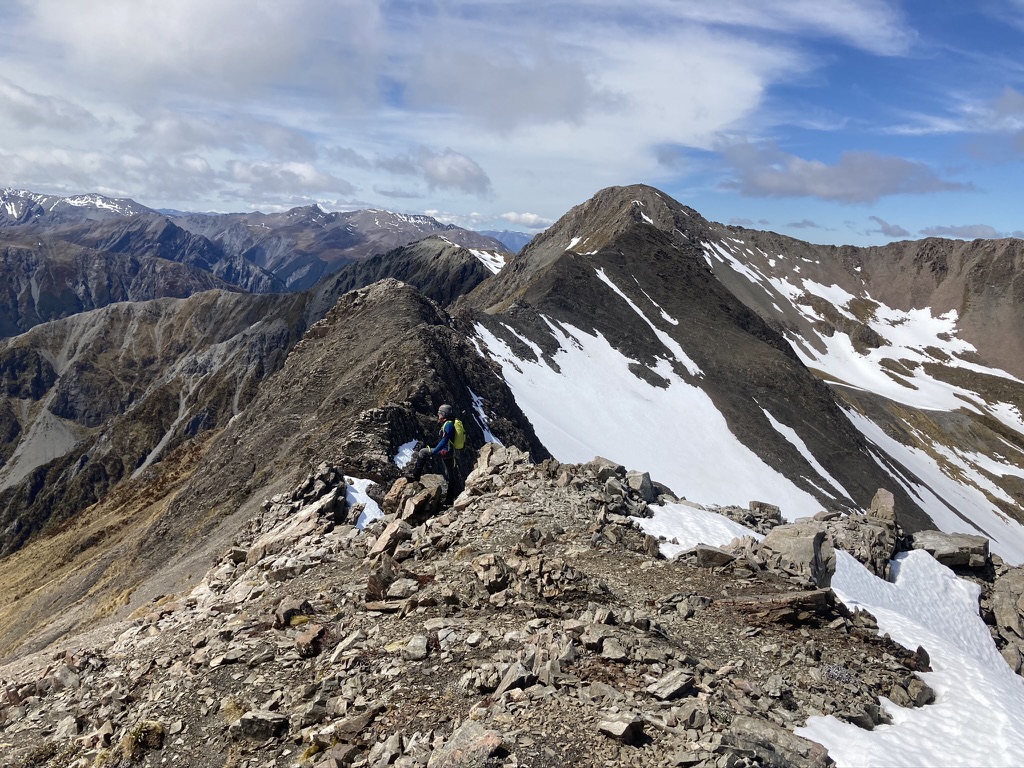
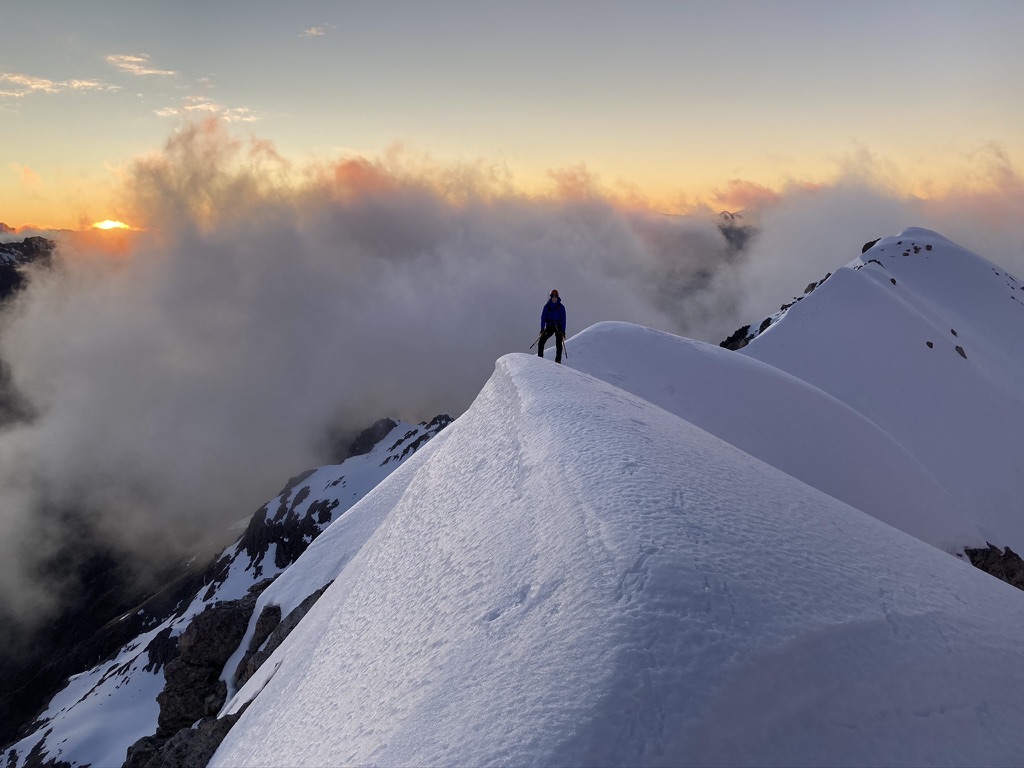
The first real challenge on the Rome Ridge is not too bad, but can be a little unsettling in the dark. Most of the rock is quite loose so care is required. Once above this section we had another long and wonderful undulating ridge to traverse. It’s thin enough to be exciting, but not so thin that your heart starts vibrating your ribs!

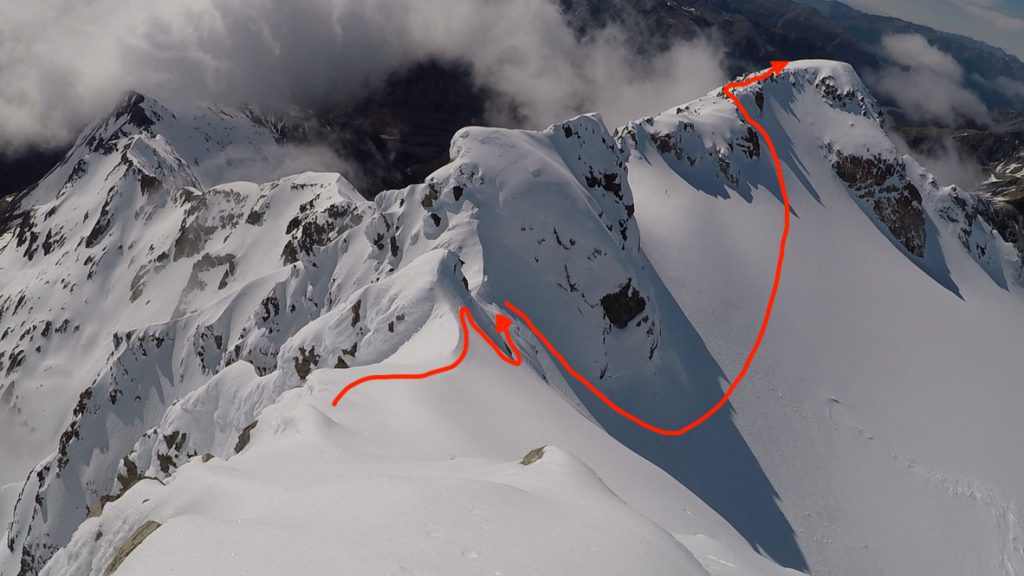
This whole next section is quite straightforward and before you know it you arrive at the second buttress, a monster – it’s viability to climb dependent entirely on the conditions of it’s east face. We approached the small notch just beneath it and assessed that the line of firm snow leading up and to the left of the face was just too thin to risk going up over. Besides, the lack of steps ahead meant the team ahead had decided on the icy descent and popular traverse on the south side. So we followed suit. This section is not nearly as steep as the pics on the internet would have you believe. It reminded me very much of the lower half of the classic couloir on Mount Hopeless. A straightforward two axe scramble down and around (bit of a calf burner – but nothing compared to what is coming up) and we arrived at the Gap.
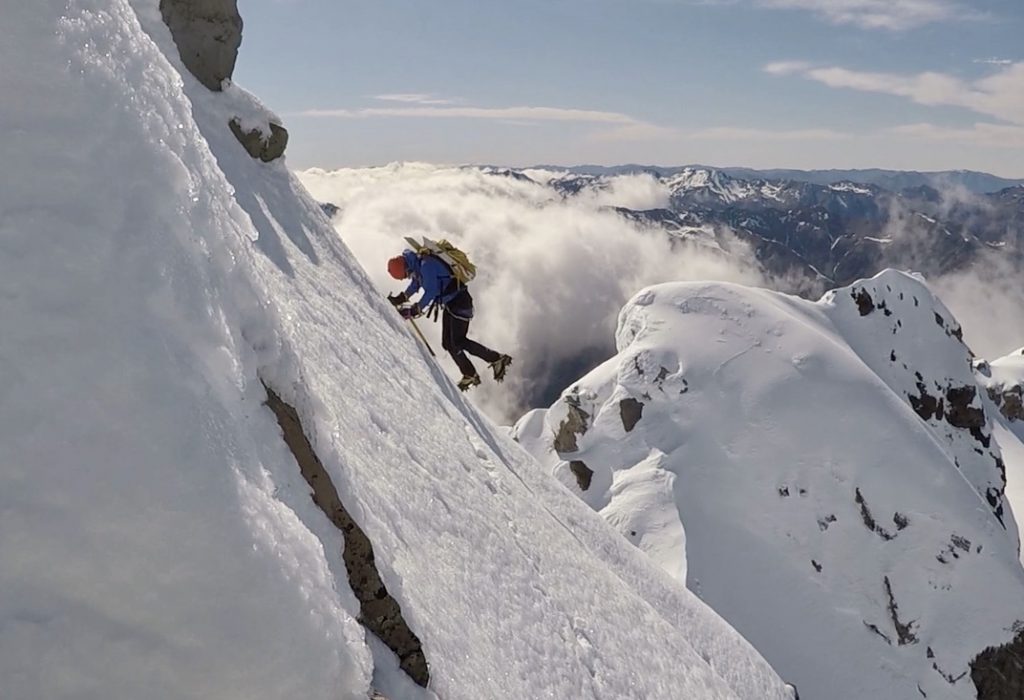
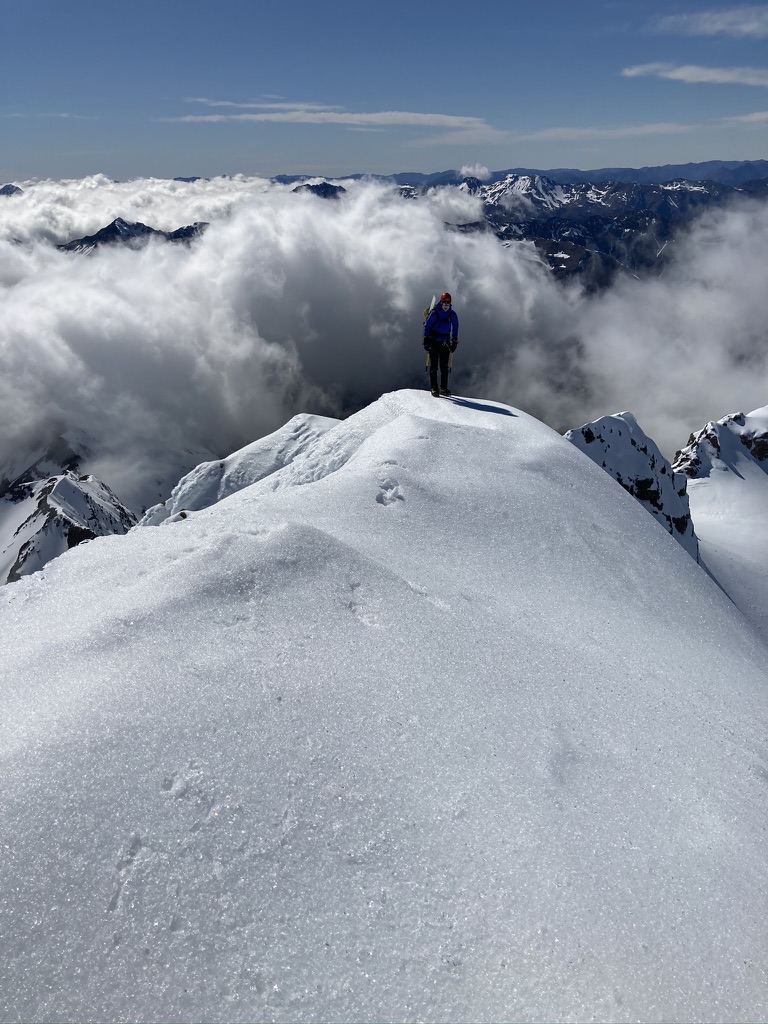
I had heard a heap of different reports about this section and yet still couldn’t form an image of exactly what it was and why it was considered the crux of the route. What we found was a nice little rest spot – which was just what we would need before the next section. It’s the section immediately after that many parties rope up for. Essentially, the issue is that snow or not, there’s a vertical climb directly out and back onto the ridge up to Low Peak. You’d need a rope should you decide to go direct. The alternative is a slight descent onto the North side and up and around on the Bealey Face. This is what we did as the snow was simply too thin to take any sort of direct route up. This section should not be underestimated – whilst it doesn’t look too bad from the gap itself, it’s steep and very exposed. And most importantly, it’s sustained. There is no chance for a rest (without cutting ledges) until you are back on the ridge proper. And even then, the ridge isn’t exactly leg friendly. The snow was good enough for us to do this all without a rope, even though I would have felt a whole lot better with one.
After about 20 minutes of sustained two axe climbing, we arrived back on the ridge and wasted no time firing up the crest. Every 50 metres or so there’s the odd rock sticking out where I had hoped to find a little flat rest spot. Alas, none of them were nearly as good as expected so we just pressed on, digging the odd ledge at intervals.
As many reports had accurately suggested, we arrived up onto the summit of Low Peak exactly 6 hours after leaving the car – so this is a very good time estimate without using the rope. We finally bumped into the climbers up on the top. They had been to the High Peak summit and were now about to descend via the slide. We had a quick chat with them about conditions; they informed us it was quite icy on the approach to the saddle between High and Mid Peak but doable. So we gave our thanks and pressed on.
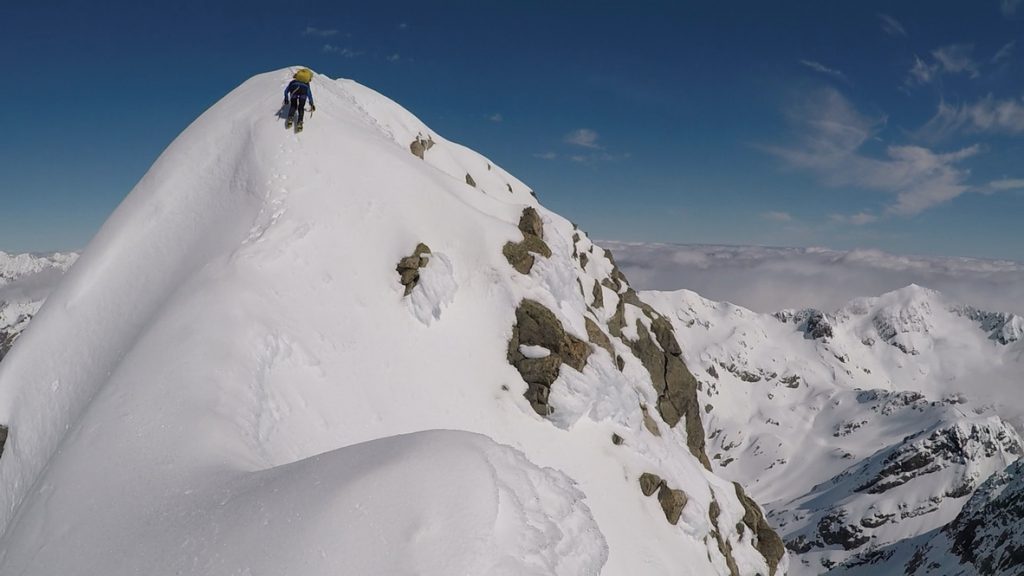
A non-eventful down climb into the glacier leads you to a bit of an awkward angled traverse across to High Peak. It’s simple, but can be quite tiring on the ankles as the ground beneath you is very icy at the best of times so you need to be well brushed up on that French technique.
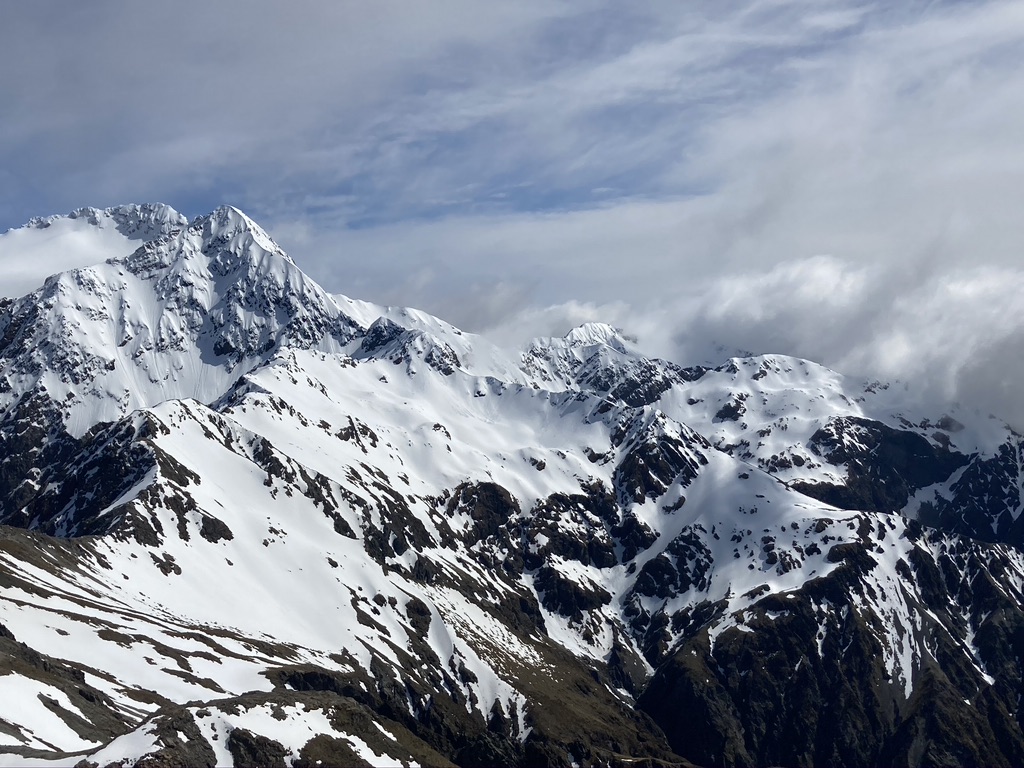
The climb up to the High-Mid saddle (where you exit left up and onto High Peak) was without doubt the most technical part of the day. Our axes barely penetrated the ice without a good swing for a good 80-100m, making the going tough and tiring. Luckily the exposure is minimal here, which was a small consolation. Once up on the saddle the ground softened up slightly. Just before the final ridge to the summit we hit a rather tricky and daunting traverse out to the left and onto the face above the glacier. It’s not long, but it takes concentration and a cool head. It might be avoidable with more snow, but not today.
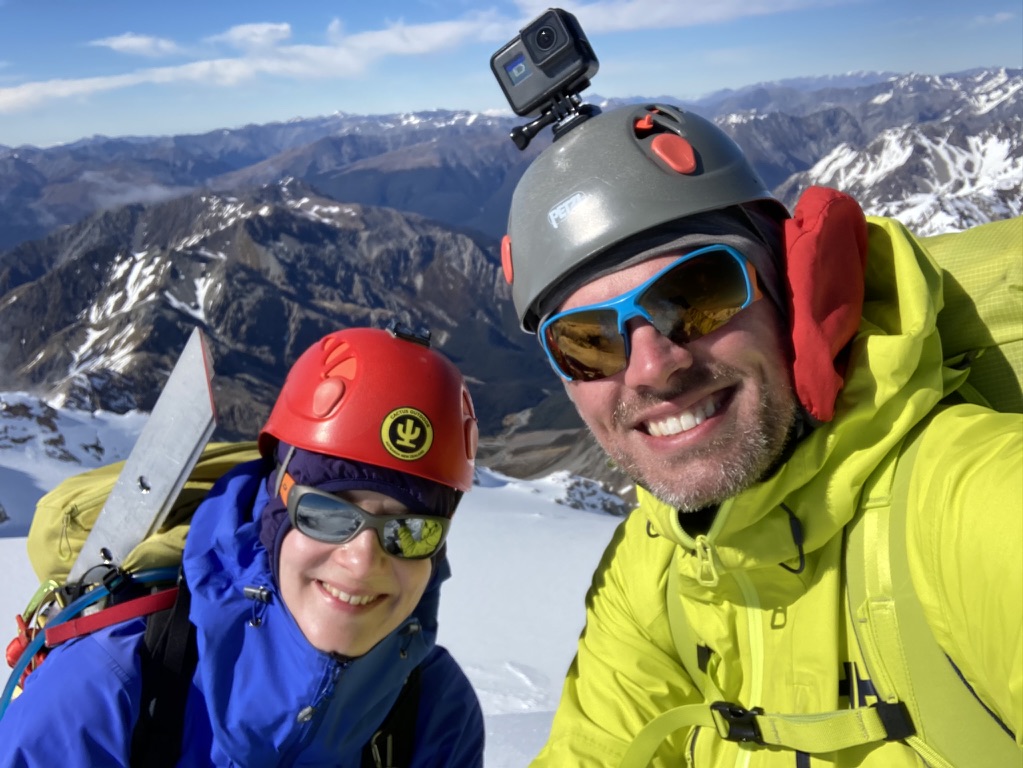
From there it was a wonderful ridge scramble to the top. As per usual, the wind was up on the summit, so we spent about 5 minutes taking the necessary views in before turning around and heading down.
We stopped for our lunch in the glacier bowl, cutting out a decent bucket to sit in. All in all it took us about 1½ hours from Low Peak to the top and back, including a fair break. Dropping down onto the ridge leading to the Otira Slide and the snow beneath us immediately changed. We were making very good time – it wasn’t even noon and yet the slipping on every step was very uncomfortable indeed.
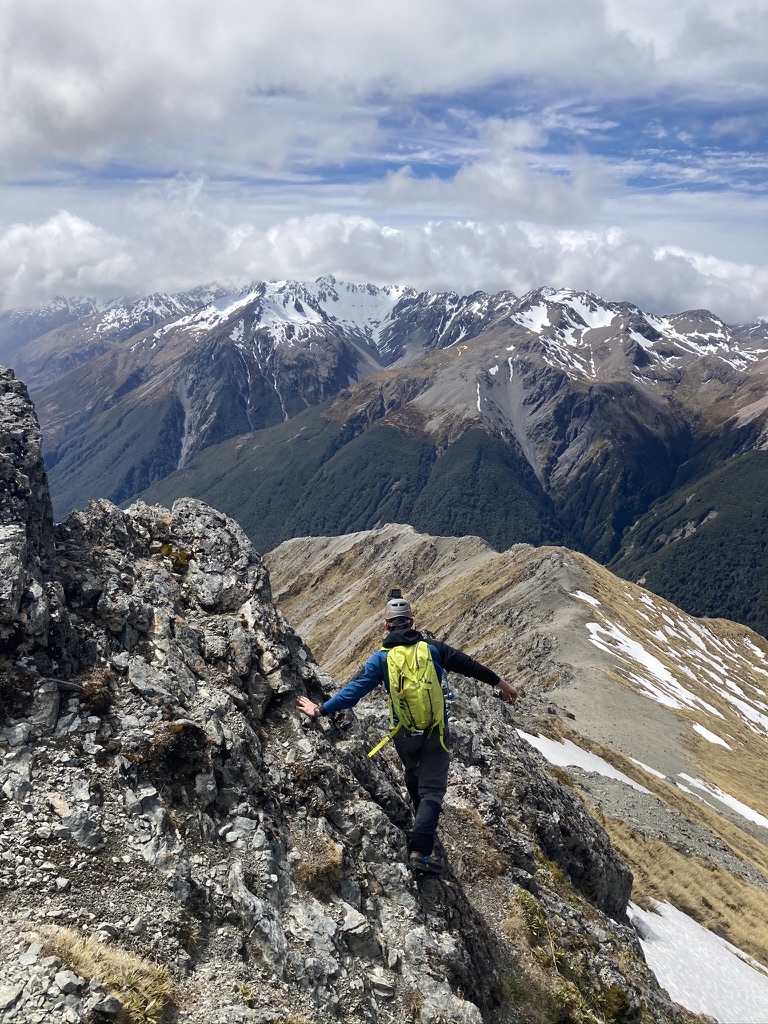
The climb down from Low Peak felt like a lifetime – it’s no small hill! Eventually we arrived onto the level ridge beneath, after turning onto the Bealey Valley side for a little while. Someone ahead of us had gone direct right down into the valley but I really didn’t like the snow on those more north eastern facing slopes so went a slightly longer way around.
We didn’t use the actual Otira Slide to descend, but a smaller alternative a hundred metres or so before it. By this point we were going in halfway to our knees in places and the north east face of Rolleston was beginning to give off loud loose wets on an increasingly regular basis. We wasted no time in following the zigzagging steps down around the various mini bluffs. Until we actually got bluffed out. We retraced back up the slope and eventually found another way off onto the bottom of the actual Otira Slide. There was a huge amount of leftover debris at the base of a previous large avalanche. From there it was an absolute slog to the edge of the snow line, at times going right through the aged snowpack to the rocks below. Hot, hard and intensely irritating!
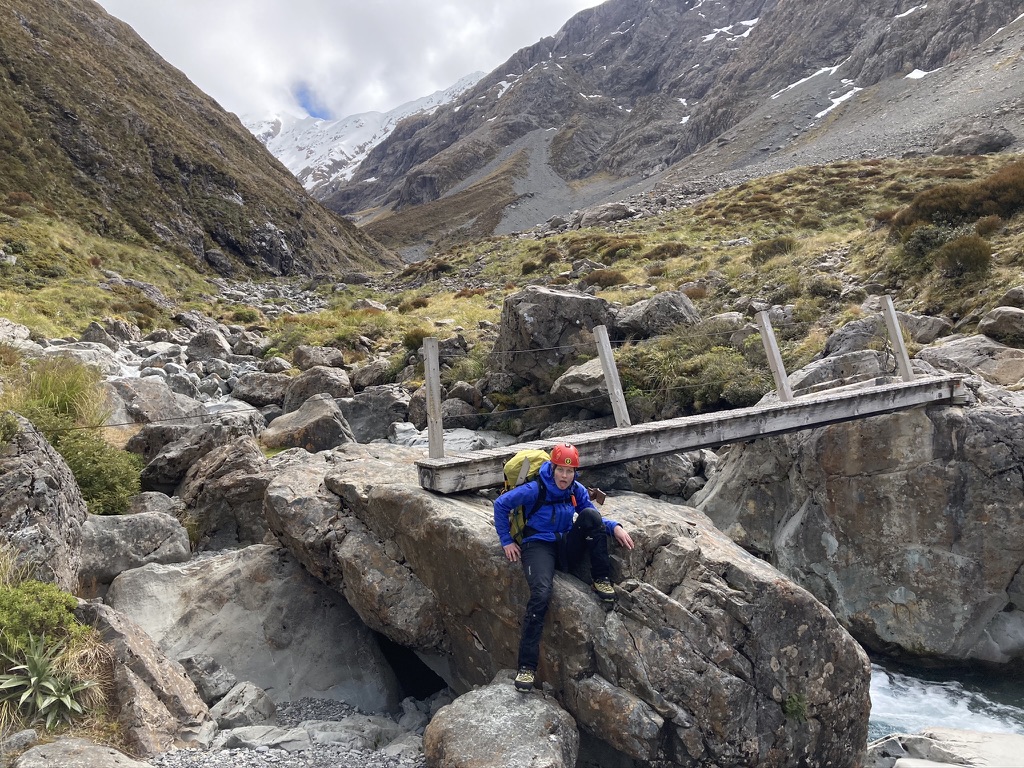
A beautiful and steady boulder hop down to where the unofficial trail begins (look for the cairns) takes you onto the real DOC track a short time later, over a small bridge and on to the road end. We arrived shattered and satisfied, and picked up a ride with a lovely lady just 5 minutes later, who took us to our car back at the Coral Track.
That night we went for a huge dinner at the Bealey Hotel, before heading off the next day towards Kaikoura for what I hoped would be my last ever attempt at Mount Manakau. But that’s another story….