
Summer Climb of Mt Taranaki
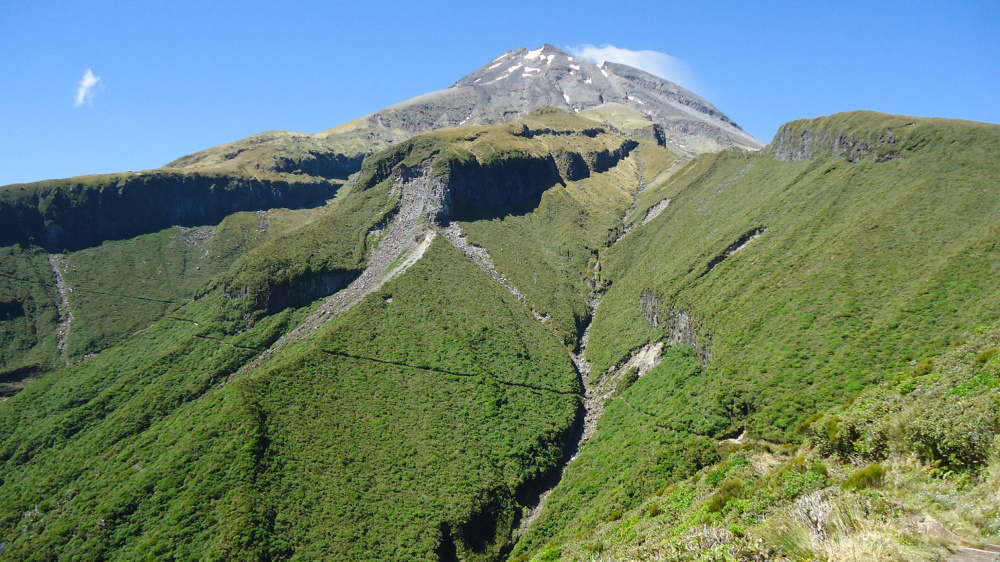
A summer day walk to the summit of Mt Taranaki on the northern side of the mountain
The following may be of interest to those unfamiliar with Mt Taranaki, but who are keen to climb it this summer.Last summer I climbed Mt Taranaki – via the Northern ‘tourist’ route. I had wanted to do the day climb for a few years but just hadn’t got around to researching what I might be in for. DOC’s website has a good page summarising the ‘Mt Taranaki Summit Track’ and the page links to an even more informative Mt Taranaki Summit Climb brochure. But I was also after additional detail and ideally some photos of the route to prepare for the day. As a ‘first-timer’ and unfamiliar with the mountain, the following report includes most of the extra detail I was looking for. It may be of interest to other ‘first-timers’.
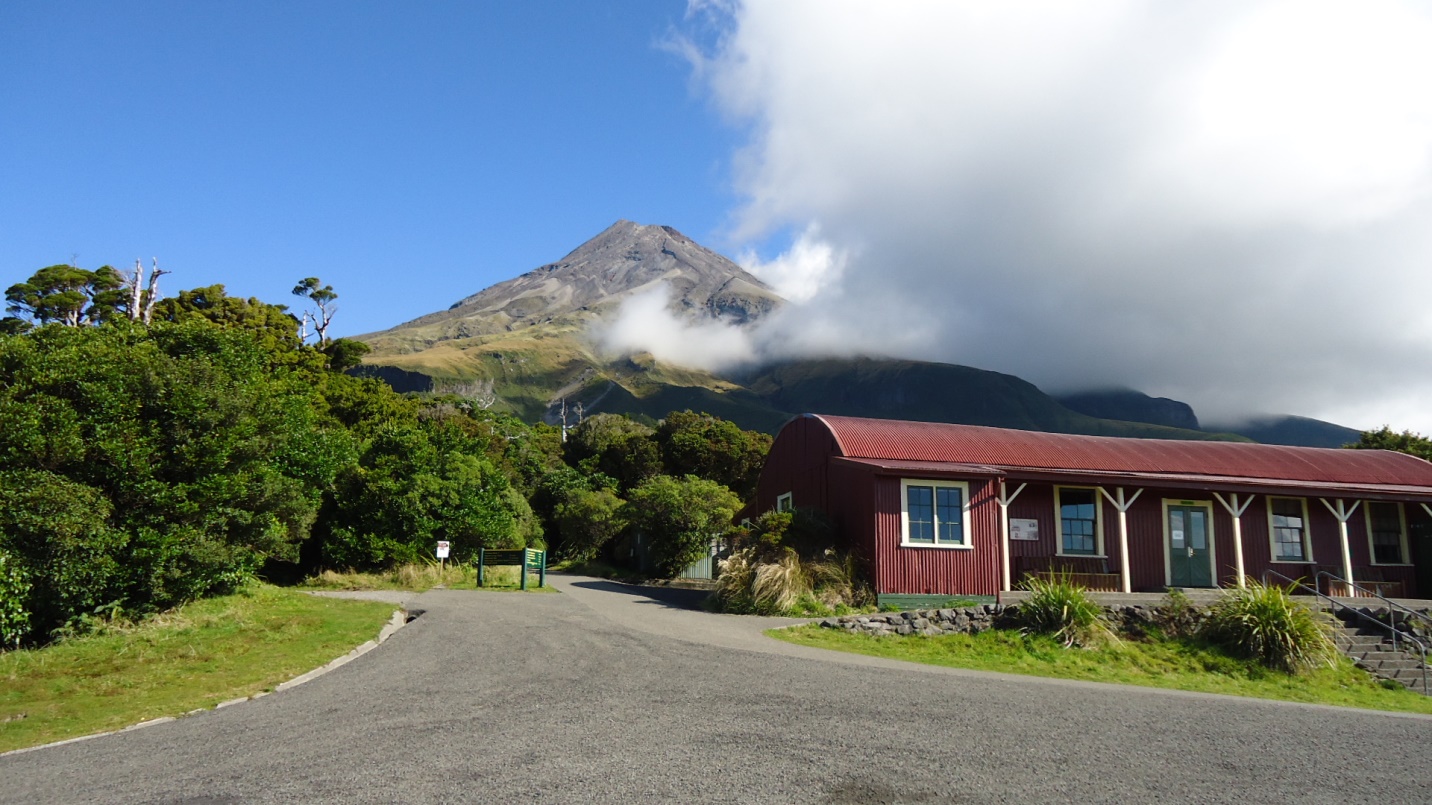
Arrive at the Taranaki/Egmont National Park Visitor Centre early. Ideally by dawn or not much later especially if the forecast is indicating a hot day. The Visitor Centre is only 30 minutes’ drive from New Plymouth which offers lots of accommodation options.
Don’t be alarmed if you find the carparks full – very likely on a public holiday or weekend. The overflow will park on Egmont Road. Follow their lead if you need to (there will of course be fewer cars on non-holiday weekends or week days for those seeking a quieter experience.)
An early start will allow a full day if you need it. You won’t be alone if you start early. In fact, as you climb up, others will be coming down who started way earlier to watch the sunrise from the summit. Remember the headlamp if you intend to start the climb before dawn, particularly if it is overcast. Water bottles can be filled at the Visitor Centre. Public toilets are also available at the car park.
For those not familiar with the Mt Egmont Road end, the start of the track is not that obvious. From the Visitor Centre, walk up the road for five minutes until you see the red Camphouse. (A path on the right of the road near the Centre will also get you there.) At the Camphouse, take the path heading to the left. Go through the wooden ‘kissing’ gate beside a padlocked chain link vehicle gate. This is where the adventure begins.
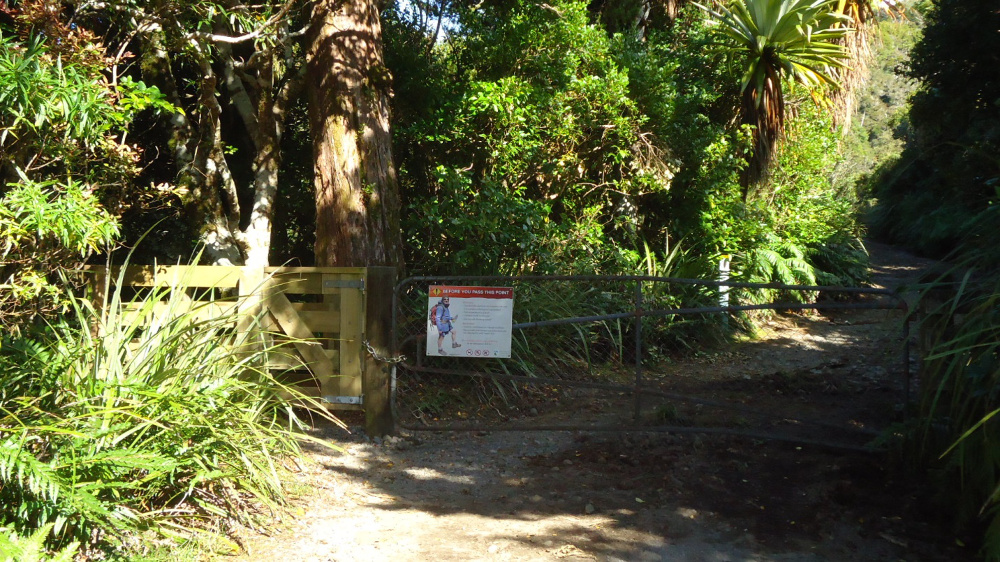
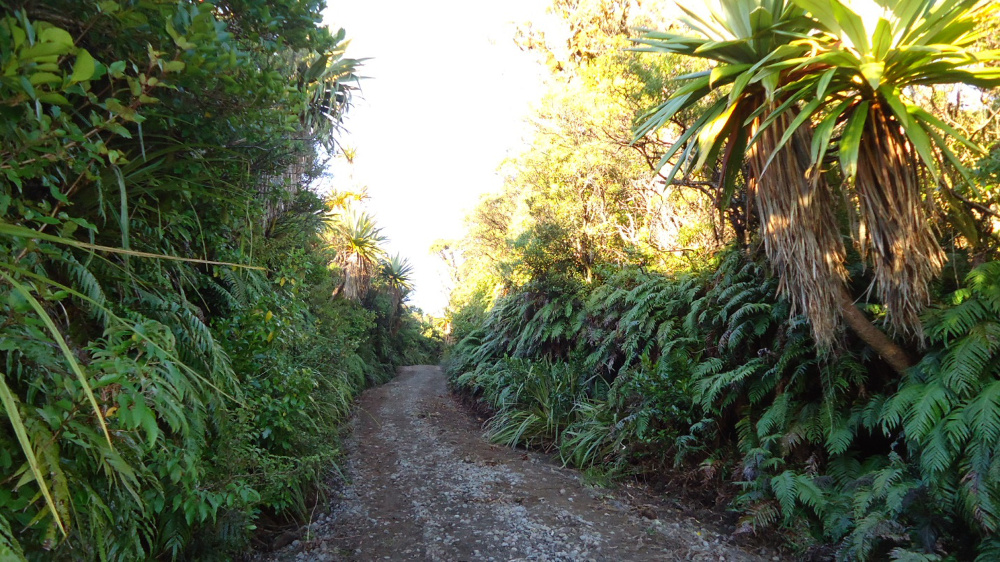
The first section of the track (20 mins) is in native bush up Translator Road. The road is a 4WD track with a gradual incline. It’s a gentle start to the climb and no reflection of what’s to come.
Great views come into play at a prominent corner around the 2.4km mark (30-40 mins). This is where the track from Maketawa Hut joins the 4WD track. It’s also where you’ll hit ‘The Puffer’. This is the first challenge of the day. Leaving the carpark early gives visitors the flexibility to ease back on the pace when they hit the Puffer so as not to let it take too much of the fun away. The surface of the Puffer is solid underfoot; it’s the incline that will slow you down.
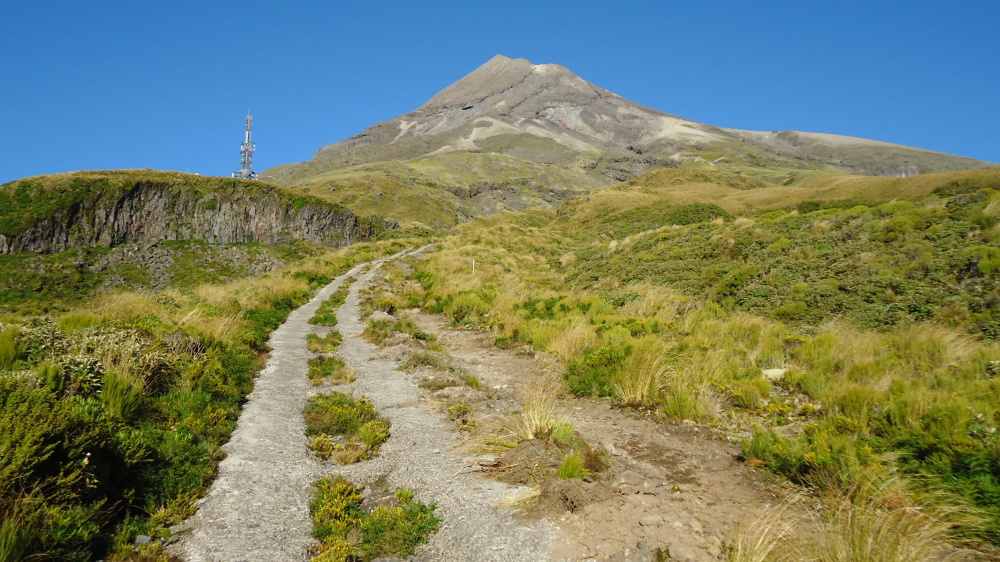
After another kilometre or so you’ll reach the Tahurangi transmitter tower. This is where you will find the only toilet on the climb. The 4WD track ends at the tower – a couple of hundred metres below Tahurangi Lodge.
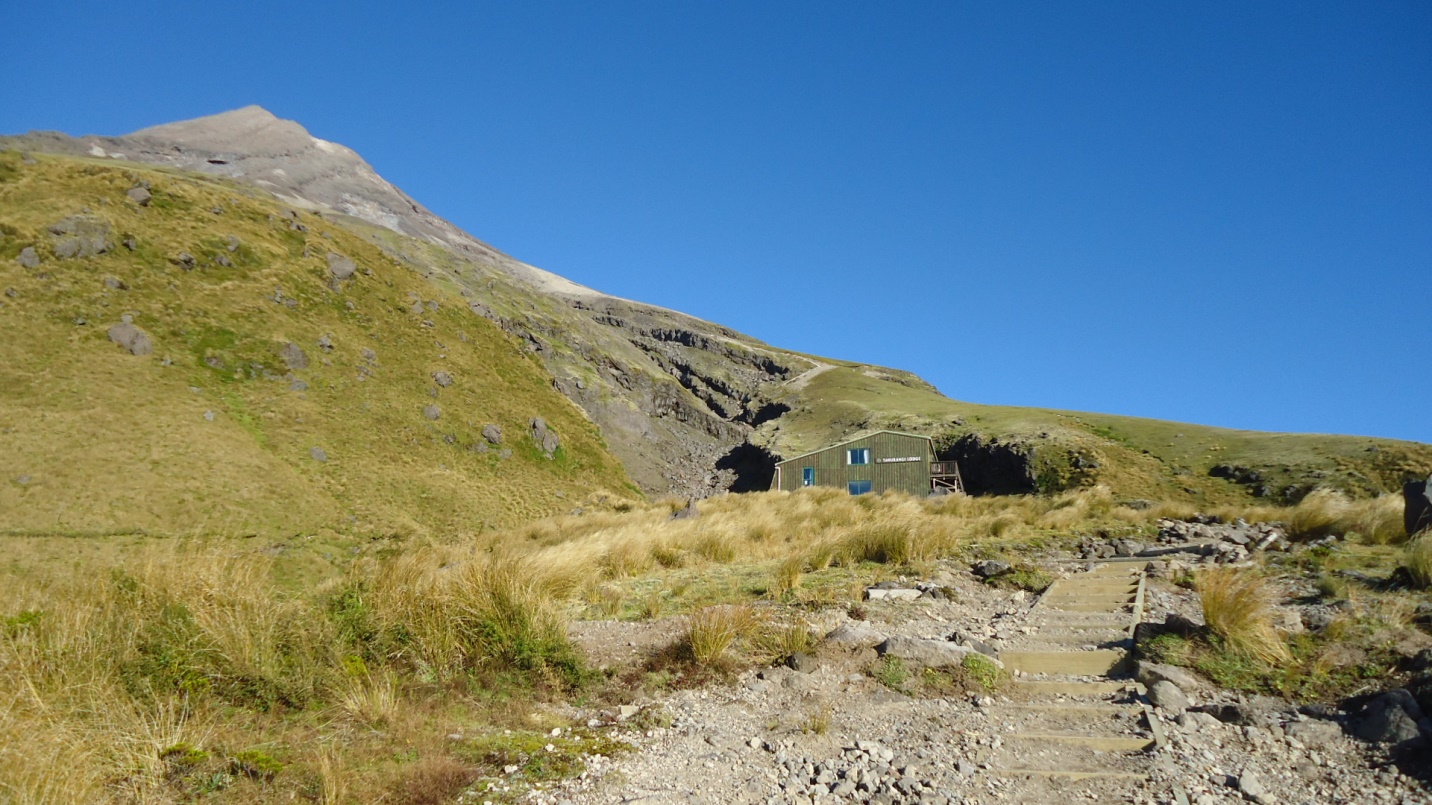
From the Tahurangi Lodge, a wooden poled route guides you up through the rocky Hongi Valley. For many, Hongi Valley may be the easiest and most interesting section of the walk. It’s also the shortest section.
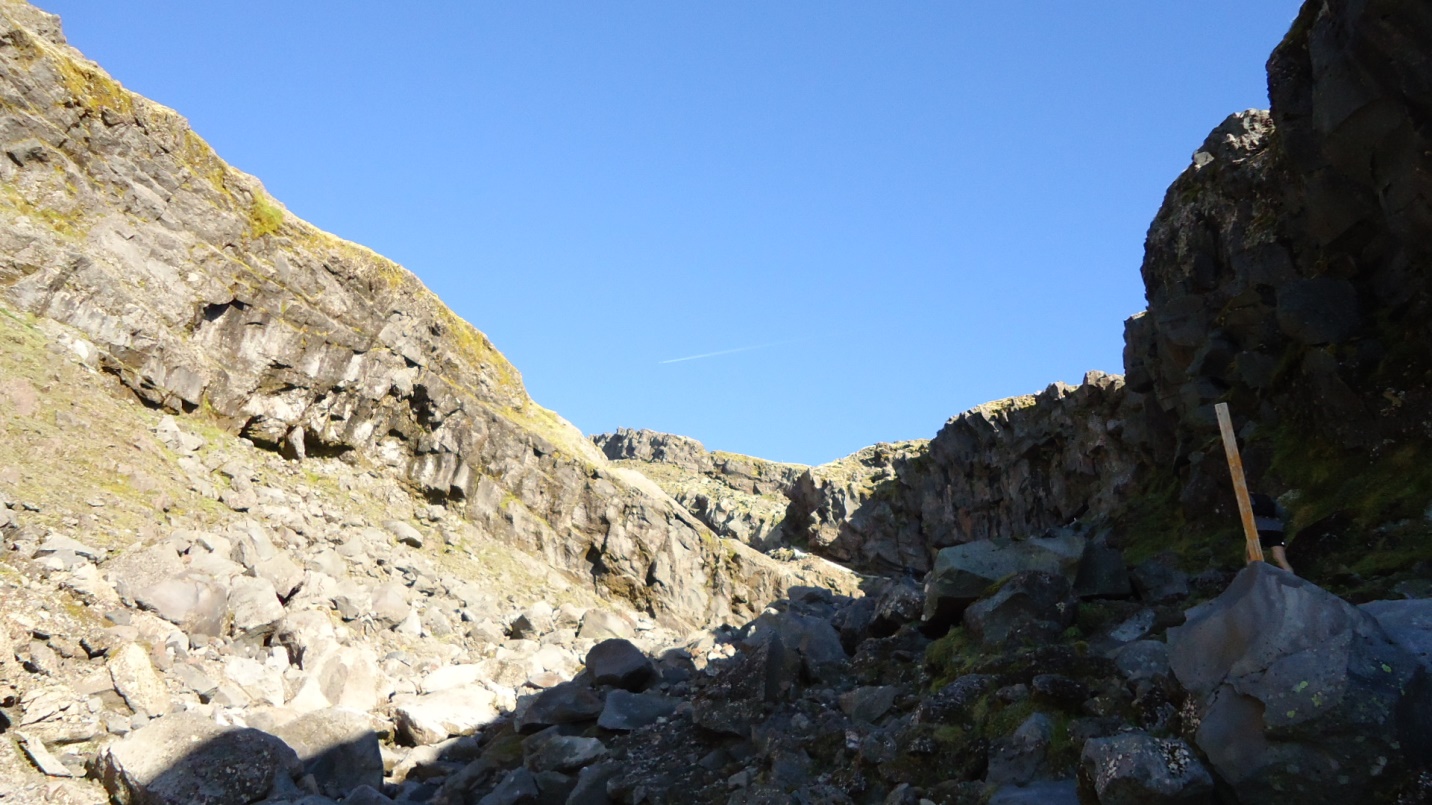
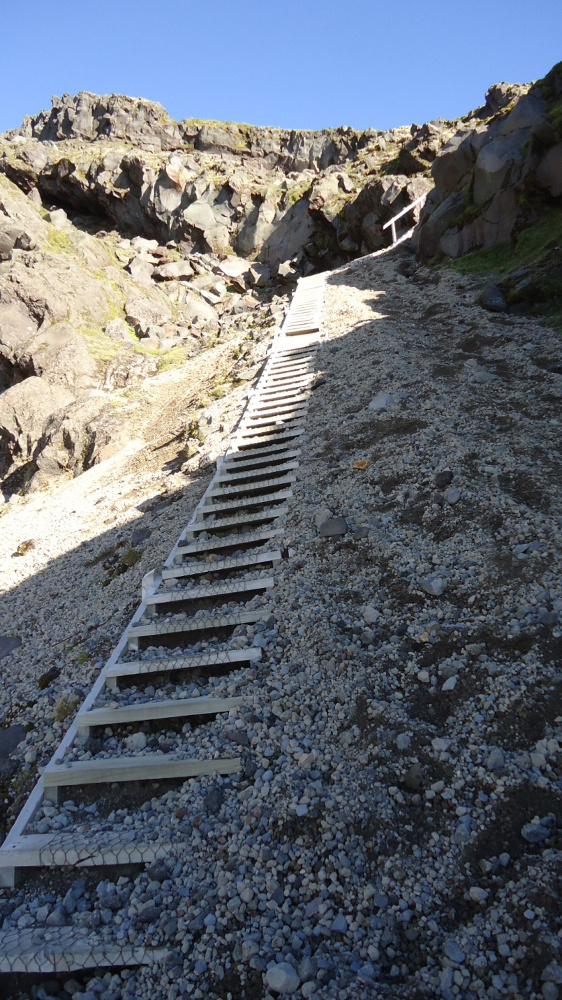
Next is a section of wooden steps that will get you up out of Hongi Valley. They’re quite manageable but don’t expect much in the way of handrails (a walking pole might make a good proxy handrail). While the steps are a change from the lava rock boulder-hopping in Hongi Valley, they shouldn’t be underestimated. There are a few of them. They are steep and exposed.
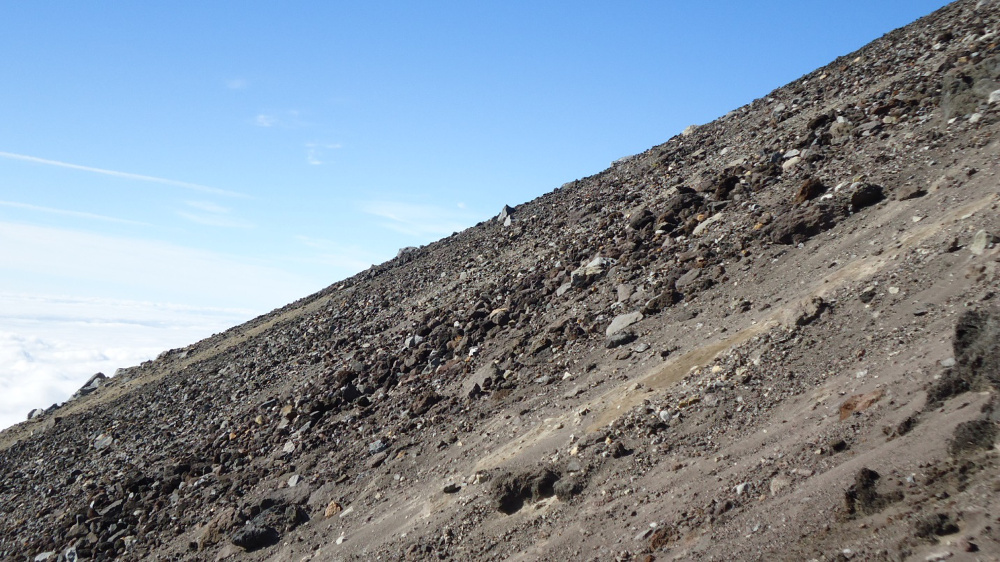
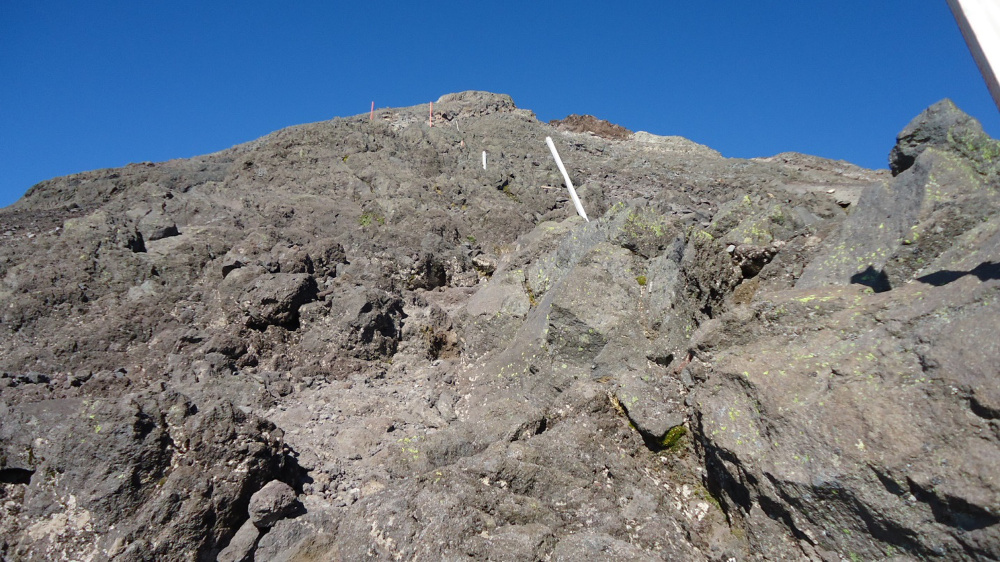
The infamous steep scoria (scree) slopes of Mt Taranaki come next. And they’re hard work. Expect that sense of ‘two steps forward, one step back’. The gravel is small and very loose. This section will seem to go on forever. And it does – not in distance but because of the sliding underfoot. A level of perseverance to go on may be required here. Despite the now relentless incline, there are occasional places to sit and take in the views. Once you’ve covered the scoria, you’ll then face an easier challenge – climbing ‘The Lizard’.
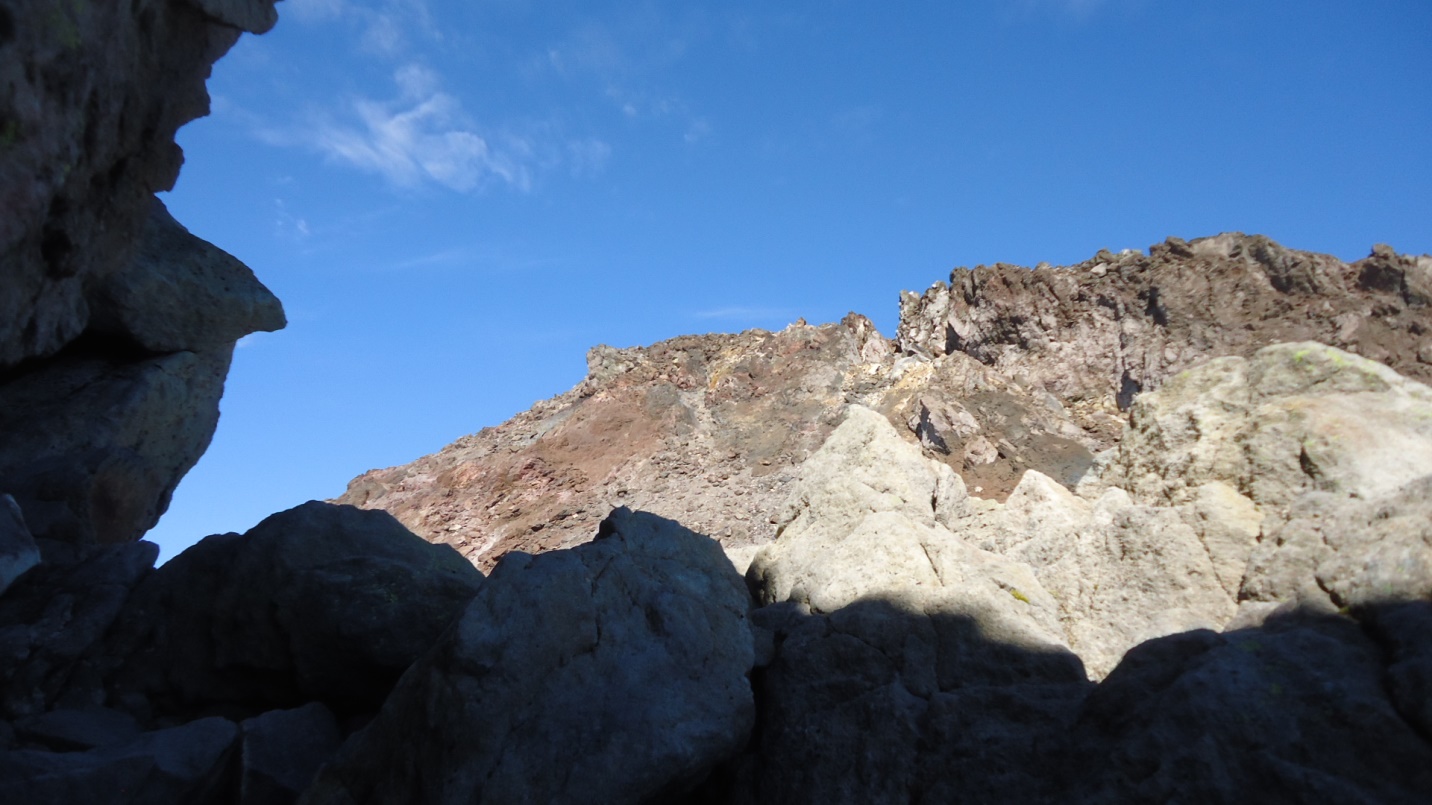
Negotiating your way up the rocky ridge called The Lizard will provide a more whole-body workout. The Lizard might be the highlight of the day for those who enjoy a good clamber up over rocks, at times needing to use all fours. The Lizard is an accommodating feature of the climb as the old lava flow provides endless options to take the weight off your feet for a breather, a snack/hydration, a photo stop – or probably all of the above. Keep an eye on the next pole as you gain elevation to guide you up this rocky ridge.
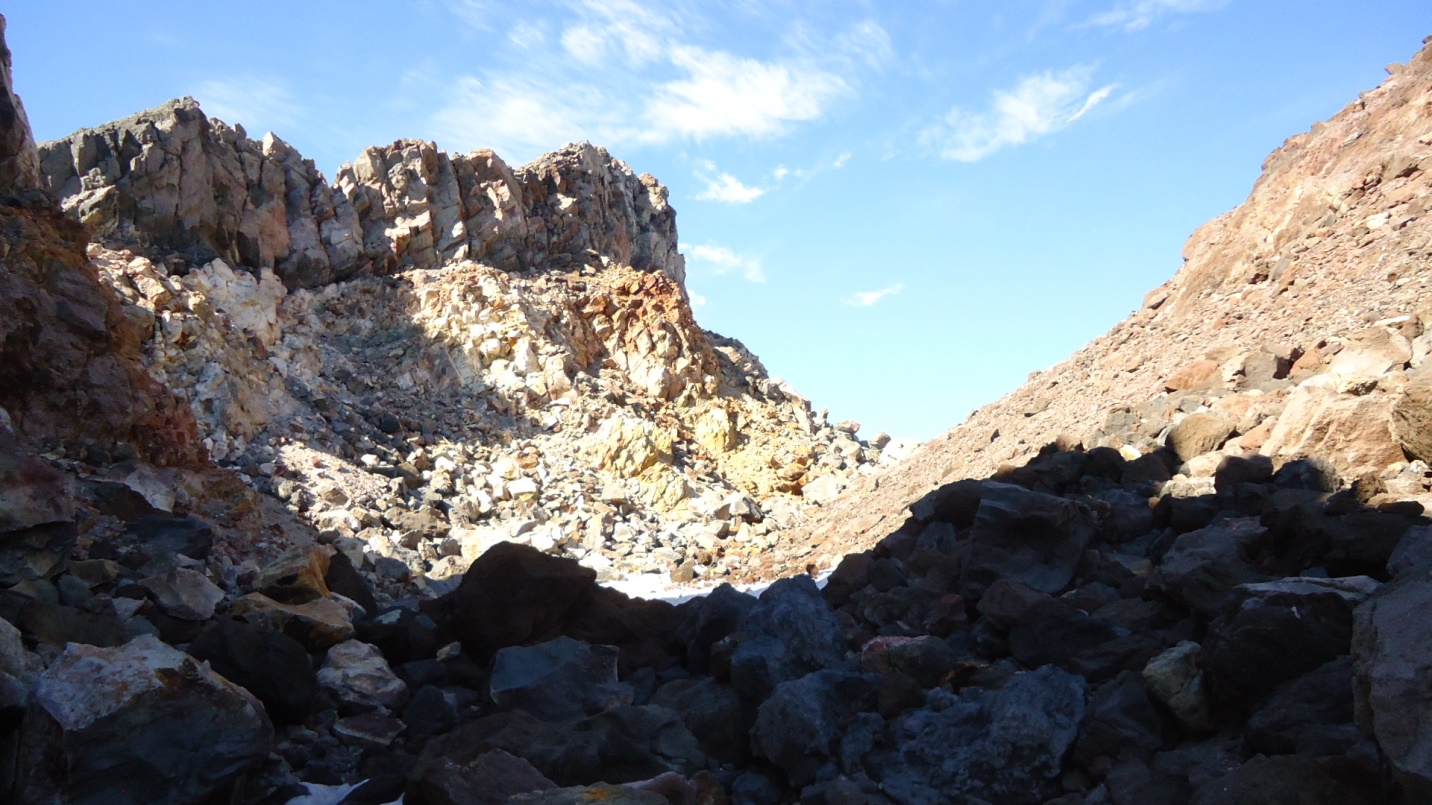
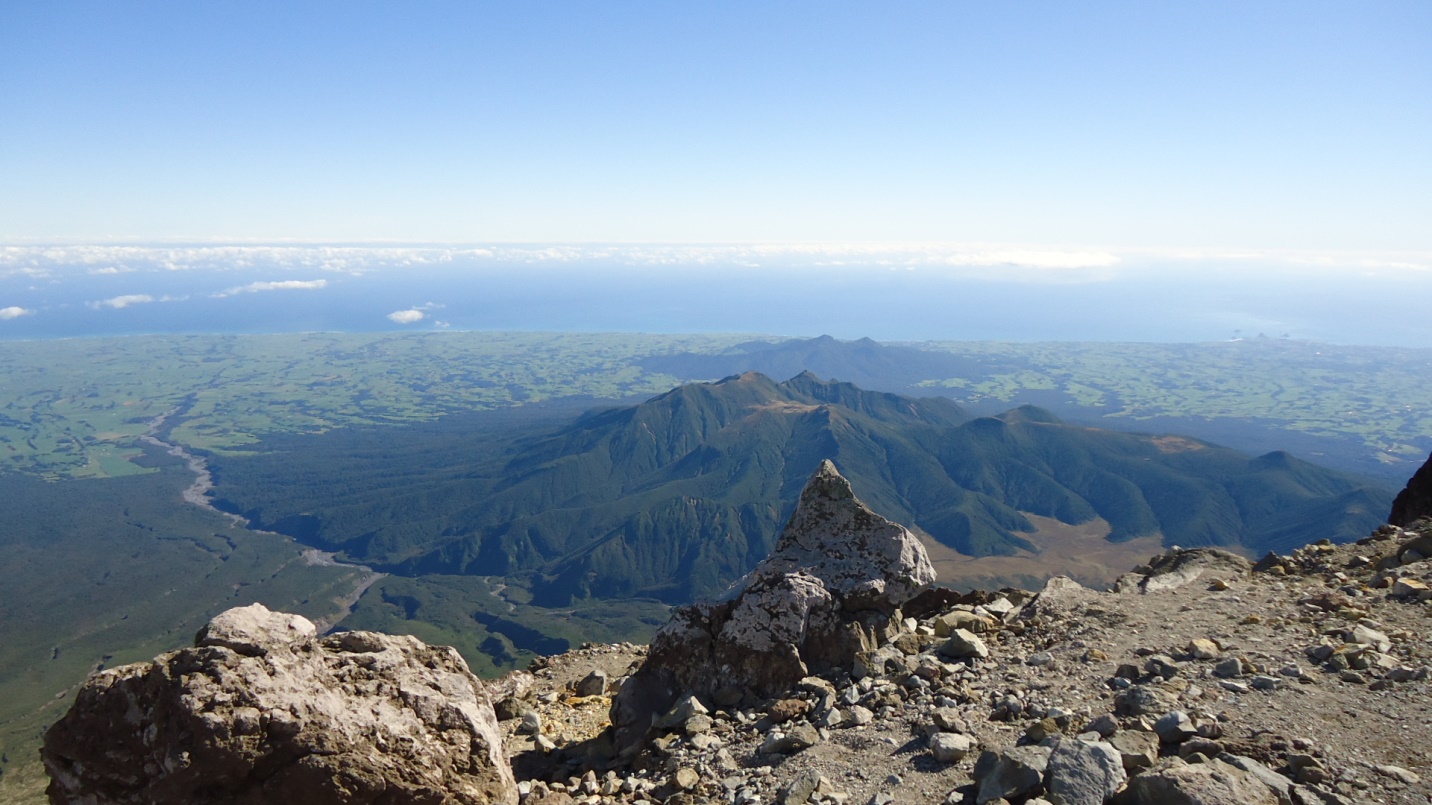
The Lizard takes you to the crater. After coming around the edge of an outcrop of rock, you’ll find yourself on the rim of the crater. For first-timers, you may think ‘you’ve done it’ but the crater (c. 2455m) is not the top. To get to the summit (2518m), drop down into the crater (a few metres) and climb up the other side to the West. There are no poles from the crater up to the summit – just pick a route that looks like it could work for you. These last 100 metres or so in distance (less in elevation) to the summit is worth the extra climb. It’s easier than it looks (providing you have visibility). The 360 degree views from the top, on a clear day, are impressive.
From the top, descend the same way. Head down to the crater, then back to the edge of the rim that drops down onto the Lizard. From here it’s downhill the whole way!
On the descent, at the bottom end of the Lizard where the Lizard meets the scoria, the poled route goes off on a slight angle to the right. This point was marked by a wooden ‘X’ to deter going straight ahead. If the visibility is low, this point might need extra attention. The descent is otherwise straightforward if you keep to the poled route.
The scoria will likely be the most challenging coming down. Look for some depth in where you step so that your boots sink a little. Steer clear of patches that look thin – they can resemble marbles on concrete. It’s perhaps best to not rush coming down the scoria.
The walk down Translator Road is as long as it is coming up (as odd as that may sound) but more pleasant.
At a club ‘Easy’ pace, the return trip will be on a par with what DOC says it takes – 8-10 hours return. This will mean around 60-90 mins to Tahurangi Lodge, around 1 ½ to 2 hours to the Lizard and another hour or so up to the top. At a club ‘Medium’ pace, the return trip is perhaps 7-8 hours. At a ‘Fit’ pace (a fast walk, not trail running), the return trip will be 5-6 hours, excluding an extended break at the top.
Times will likely be dependent upon the weather – allow extra time if there’s a decent breeze or low visibility. If you are working on, or regaining fitness, add some more for the return down. If you’re already fit, coming down might not be much faster than going up.
The optional items of gear for this summer day trip might be gaiters, walking poles and gloves. I always wear gaiters when tramping and they were a great on the scoria. I don’t use walking poles but can see how they would come in handy, especially on the scoria. Wearing gloves will provide some protection from fine abrasions to your hands when clambering up and back down the Lizard.
If it’s not closed, the Visitor Centre has a café where you can relax and absorb the awesome day walk you’ve just done.
An alternative to a summit climb
If there is a change of mind in a summit climb part way up the ascent, Tahurangi Lodge is a good point to do so. You can switch to returning to the Visitor Centre via the Tahurangi Translator Loop Track by heading off to the right (North) just after the lodge. Allow 1-1.5 hours from the lodge. It initially follows a poled route across alpine terrain. The track is along what’s also part of the Round the Mountain Track. Turn right (NE/down the mountain) when you join up with the Holly Hut Track and head back down via the lookout and Ambury Monument.
Another option back to the Visitor Centre is via Kokowai Track (3-4 hours from Tahurangi Lodge). You will get to experience a longer section of the Round the Mountain Track. The views up the mountain from the track are as great as those looking down in the valleys to the Egmont Road end area.
For a completely different WTMC climb of Mt Taranaki go to Taranaki Hard Core
For WTMC climbs on the other sides of Mt Taranaki go to Mt Taranaki West Side Story
For an easy Sth Island Alp 1 climb go to Holy Cupola!
Thanks Heather (and Beccy). I found this very useful for my first ascent over Easter. On a fine day I would definitely recommend starting at least an hour before sunrise and then you can enjoy the sunrise on the way up and have the sun high in the sky to light your views when you reach the summit. Note that the breeze (if any) will be much cooler in the early hours and you won’t have the sun on your back. My times were 4hrs to get up, 1.5hrs at the summit (it’s cool, but I was well dressed unlike some others) and 3.25hrs to get down. I had some leg pains coming down, so < 3hrs for the return would not be unusual for others. I walked at a slow but steady pace.